


I haven’t written much about wedding planning on here, so please let me know if you guys are into this type of content or if you already feel like you’re inundated with wedding stuff from too many platforms as it is.
While a handful of my friends are married, I’ve only really seen two of them actually tie the knot! My other close friends that are wifed up were already married when I met them, so I didn’t get to learn from them as they went through their own wedding planning experiences. I try to not talk about my own wedding planning too much because I don’t want to annoy people, and as a result I haven’t been asking them too many questions. (On the flip side, feel free to ask me anything and everything, I’m an open book!) If you’re in the same boat as me, I thought it might be helpful to chronicle what I learned from my engagement shoot and offer up a few tips for looking your best!
THE PHOTOGRAPHER
Our photographer Hayley is actually one of my bridesmaids’ best friends. The first wedding-related thing we did was book her because photographers’ schedules fill up so fast! We started talking in February and booked her in March, almost exactly a year out from the wedding. Our engagement shoot was part of our overall photography package, and I highly recommend taking advantage of it! While it’s wonderful to have professional photos of you and your partner not in wedding attire, it’s also a great way to make sure you mesh well with your photographer and like the outcome of the photos before your big day.
THE LOCATION
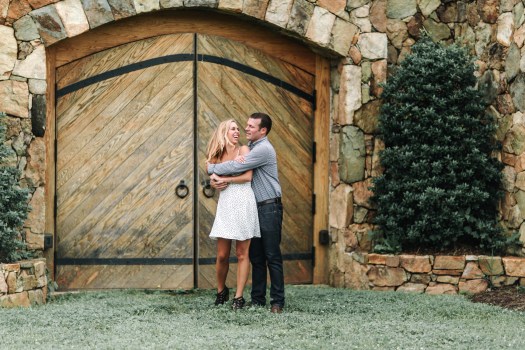
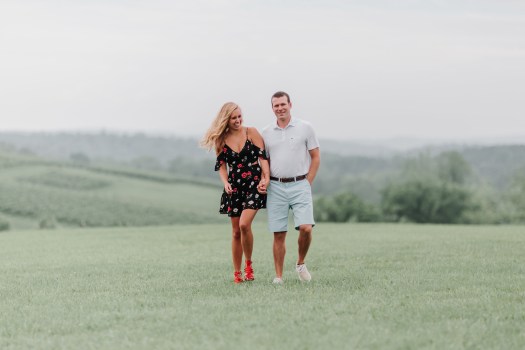
Since we are getting married in the winter, I knew I wanted our engagement shoot to be somewhere outside so we could have photos with greenery in the background. We initially wanted to shoot at the National Arboretum, but there’s actually a pretty extensive permitting process to shoot on any land that belongs to the DC National Park Service. While lamenting about the permitting process at work, my coworker suggested we do the shoot at a winery, and it was SUCH a good idea.
I chose Stone Tower Winery because I knew it had a lot of different places to take photos — in the vines, their stone patio and deck, and plenty of rolling hills. There was a $75 fee to shoot at the winery, but we got to come at 9 am and have the whole place to ourselves before they opened at 11 am. The perks of shooting early meant no one would awkwardly show up in the back of our shots, and we didn’t have an audience. While I’m used to taking photos in public for the blog, Gerald hates having his picture taken in front of people so it really helped us both loosen up. I definitely recommend shooting at an off time if possible!
THE OUTFITS
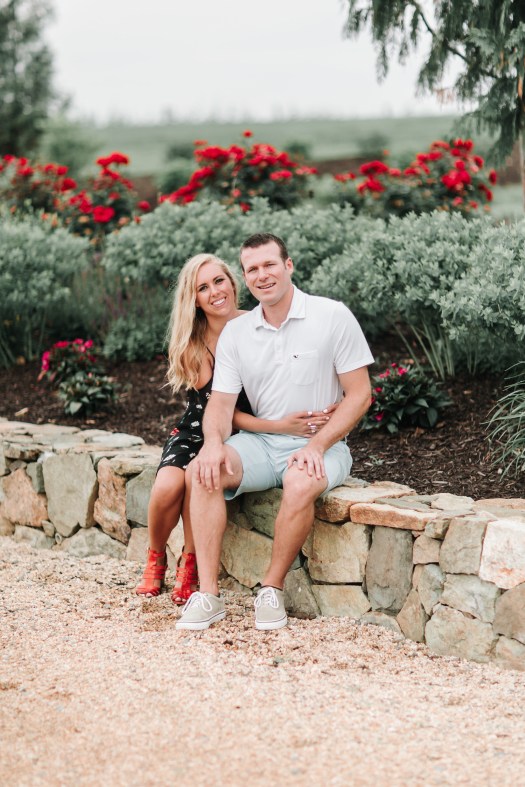
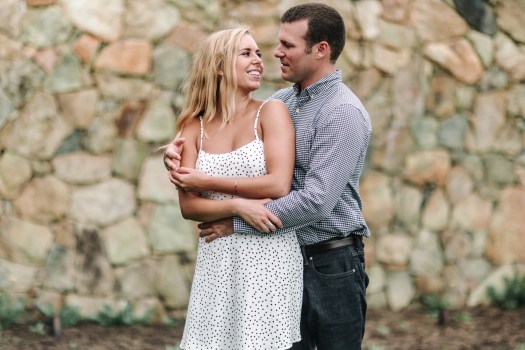
Pick two options — one more casual and one more “formal”, if you have the time to shot two different looks. I chose one dress that was very “on brand” for myself and went a little bit more conservative with my white dress.
You don’t need to rush out and buy something new — a tired and true dress that you feel pretty and comfortable in is going to translate better into photos versus something that you constantly need to adjust. You also risk the chance of your outfit not arriving on time…I ordered a maxi dress that was supposed to be delivered by noon the day before and USPS lost it. Needless to say I was a mess and spent Friday evening frantically running around Metro Center trying to find something. I ended up going with the black dress I wore for our first outfit — I’ve had it since 2013!
I did a lot of Googling about patterns in photos (something you think I would know!) and was a bit worried about how the polka dots in my white dress would translate to photos, but I lucked out! I would advise steering clear of any thin stripes, but other than that, you don’t need to stick to solids. Let your personality show!
Definitely opt for fabrics that don’t wrinkle. We ironed Gerald’s clothes the night before and hung them up in the car so that they would stay neat on the drive to the winery and while there are still some shots that have wrinkles, they aren’t so bad that they distract from the shot. Also make sure to keep an eye on your guy’s tuck, Gerald’s shirts always creep out of his belts in the back, especially if you’re doing poses like the “princess carry”.
THE DAY BEFORE
- Drink at least 12 glasses of water, (6 Swell bottles worth!) this will help your skin look hydrated, help flush out toxins, debloat, and help your makeup take to your face better the next day
- Refrain from alcohol and super salty foods, both can make you bloat and when I drink it goes straight to my face the next day
- Do a face mask and/or scrub to prep your skin!
- Lay out and iron all of your clothes. Also make sure to put accessories and shoes with your outfit or in bags by the door — you’ll likely be a little frazzled and don’t want to forget anything!
- Get a mani for sure,and a pedi if you will be wearing open-toe shoes. You’ll likely be taking shots up close of your ring and you don’t want chipped nails all up in there! (Also make sure your partner neatly trims their nails, ask gently though!)
THE DAY OF
- Get a workout in if you can! It will help you feel more confident and those post-sweat endorphins will help create a natural glow. You can use an an ice roller to firm up your skin and help reduce any redness after exercising! I have this one from Amazon and keep it in the freezer
- Water, water, water and try not to drink too much caffeine, which drys out your skin. This sounds weird, but the whites of your eyes also are more white when you’re hydrated, making your eye color pop!
- Put a little more makeup on than you typically do, even if you feel silly in real life it will translate well to photos, but not so much that you don’t look like yourself.
- Use hair product! I woke up at the crack of dawn to blow it and curl my hair for our photos and while I used hairspray, it was no match for the humidity. I hadn’t realized that Gerald’s car air conditioning was broken and by the time we got to the winery (an hour away) it was in full on frizz mode. I was pretty upset and hate the way my hair looks in the majority of our photos, but it is what it is
THE POSES / SHOTS
I’m actually a total nerd when it comes to posing in front of the camera (I can get real awkward real quick) and Gerald has two poses, so I was a little worried about what the heck we were going to do with ourselves in all of the photos. Luckily, Hayley told us exactly what to do the entire time and we basically didn’t have to think! A good photographer should be able to direct you what to do, and it’s definitely a question you should ask when you’re narrowing down potential photographers — “Will you tell us how to pose throughout the shoot?”
Even though the shoot was so easy with Hayley’s direction, I wish I had laid out a few shots I wanted beforehand. I think I was so stressed out in the heat and with making sure Gerald was okay I forgot to speak up! I wish I had asked for some more detail shots of my ring (realizing I can get these on our wedding day, but still!) and some more simple shots of us smiling straight on at the camera.
You’re going to feel SUPER cheesy doing most of the poses that your photographer suggests you do, but just go for it! They know what they’re doing. I would never be able to get Gerald to take a picture twirling me around in any other setting, so it’s definitely fun to have some silly shots.
One other tip would be to ask your photographer if they’ll be editing some images in grayscale and some in color. I know a lot like to keep their creative license, but upfront and before you sign a contract, I’d ask if you can have the photos in both edits, color and grayscale.
All in all, don’t get too stressed out by the engagement shoot and try and remember to be yourselves!
